How to create your own simulation centre
19 January 2015
How to create your own simulation centre
By Steven van Campen – More and more of our users are choosing to create a fixed simulation centre. It is a step that can greatly benefit your organisation, provided that you do it well. We are happy to help you with this. In this blog post, I will explain our method of operation.
There are various reasons for the increasing popularity of fixed simulation centres. One of them is the ongoing centralisation of emergency services, which results in the creation of central training teams that have the need for a permanent location for their activities.
But the number one reason we hear from our users, is: ‘We are tired of dragging cables and computers around’. This makes sense. Having to set up your flexible simulation set for every training is not just a hassle. It also increases the risk of errors and technical problems which impact the quality of your training.
Benefits of a fixed simulation centre
Besides a welcome end to the dragging around of equipment, a fixed simulation centre has other important benefits:
- Immersion – A fixed training centre allows an optimal set-up that provides candidates with a maximal sensation of immersion in the simulation.
- Comfort – In a fixed simulation centre, you can ensure sufficient ergonomics, lighting and ventilation, in compliance with general assessment guidelines.
- Control for the instructors – Instructors can operate more effectively in a space of their own, which they can set-up according to their needs.
- Simplicity and usability – No more dragging around of cables and PCs, but a solution that is always ready to go.
- Durability – Having your equipment in one place also means less wear and tear and less risk of technical issues
- Flexibility – By analyzing your needs and setting up your centre in a smart way, you can create a highly flexible training space which is suitable for multiple aspects of your curriculum as well as adapting to new training methods.
However, the effectiveness of your fixed training centre depends on the choices you make in its design phase. It is crucial to map out your current and future needs and conditions in advance. The good news is: this is where we can help you.
By applying our experience with users worldwide, we have developed a methodology for the design and implementation of simulation centres. This methodology offers you a step-by-step guideline to create a simulation centre that supports all your current and future training needs. We can also help you apply globally used best practices in usability and ergonomics.
Designing a simulation centre: here’s how it works
Our methodology for developing a simulation centre consists of the following steps:
1. Initial contact
In an exploratory discussion, our account manager defines a broad outline of your needs and of the problem you wish to solve by switching to a fixed simulation centre.
2. Identify needs and conditions
We then proceed to identify your needs in further detail, by asking a number of specific questions: why do you want a simulation centre? What does your current curriculum look like? What does your future curriculum look like? What are the links with your other processes? And, importantly: what is not possible or not allowed?
3. References and best practices
We compare your package of demands with other simulation centres around the world, and identify which best practices from those centres can be applied in your situation.
4. Selecting the space
An important step. We not only review the space itself and any of its additional functions, but also the location of the facility. Is it easily accessible? Is it an active station, so that participants can remain on-call during training?
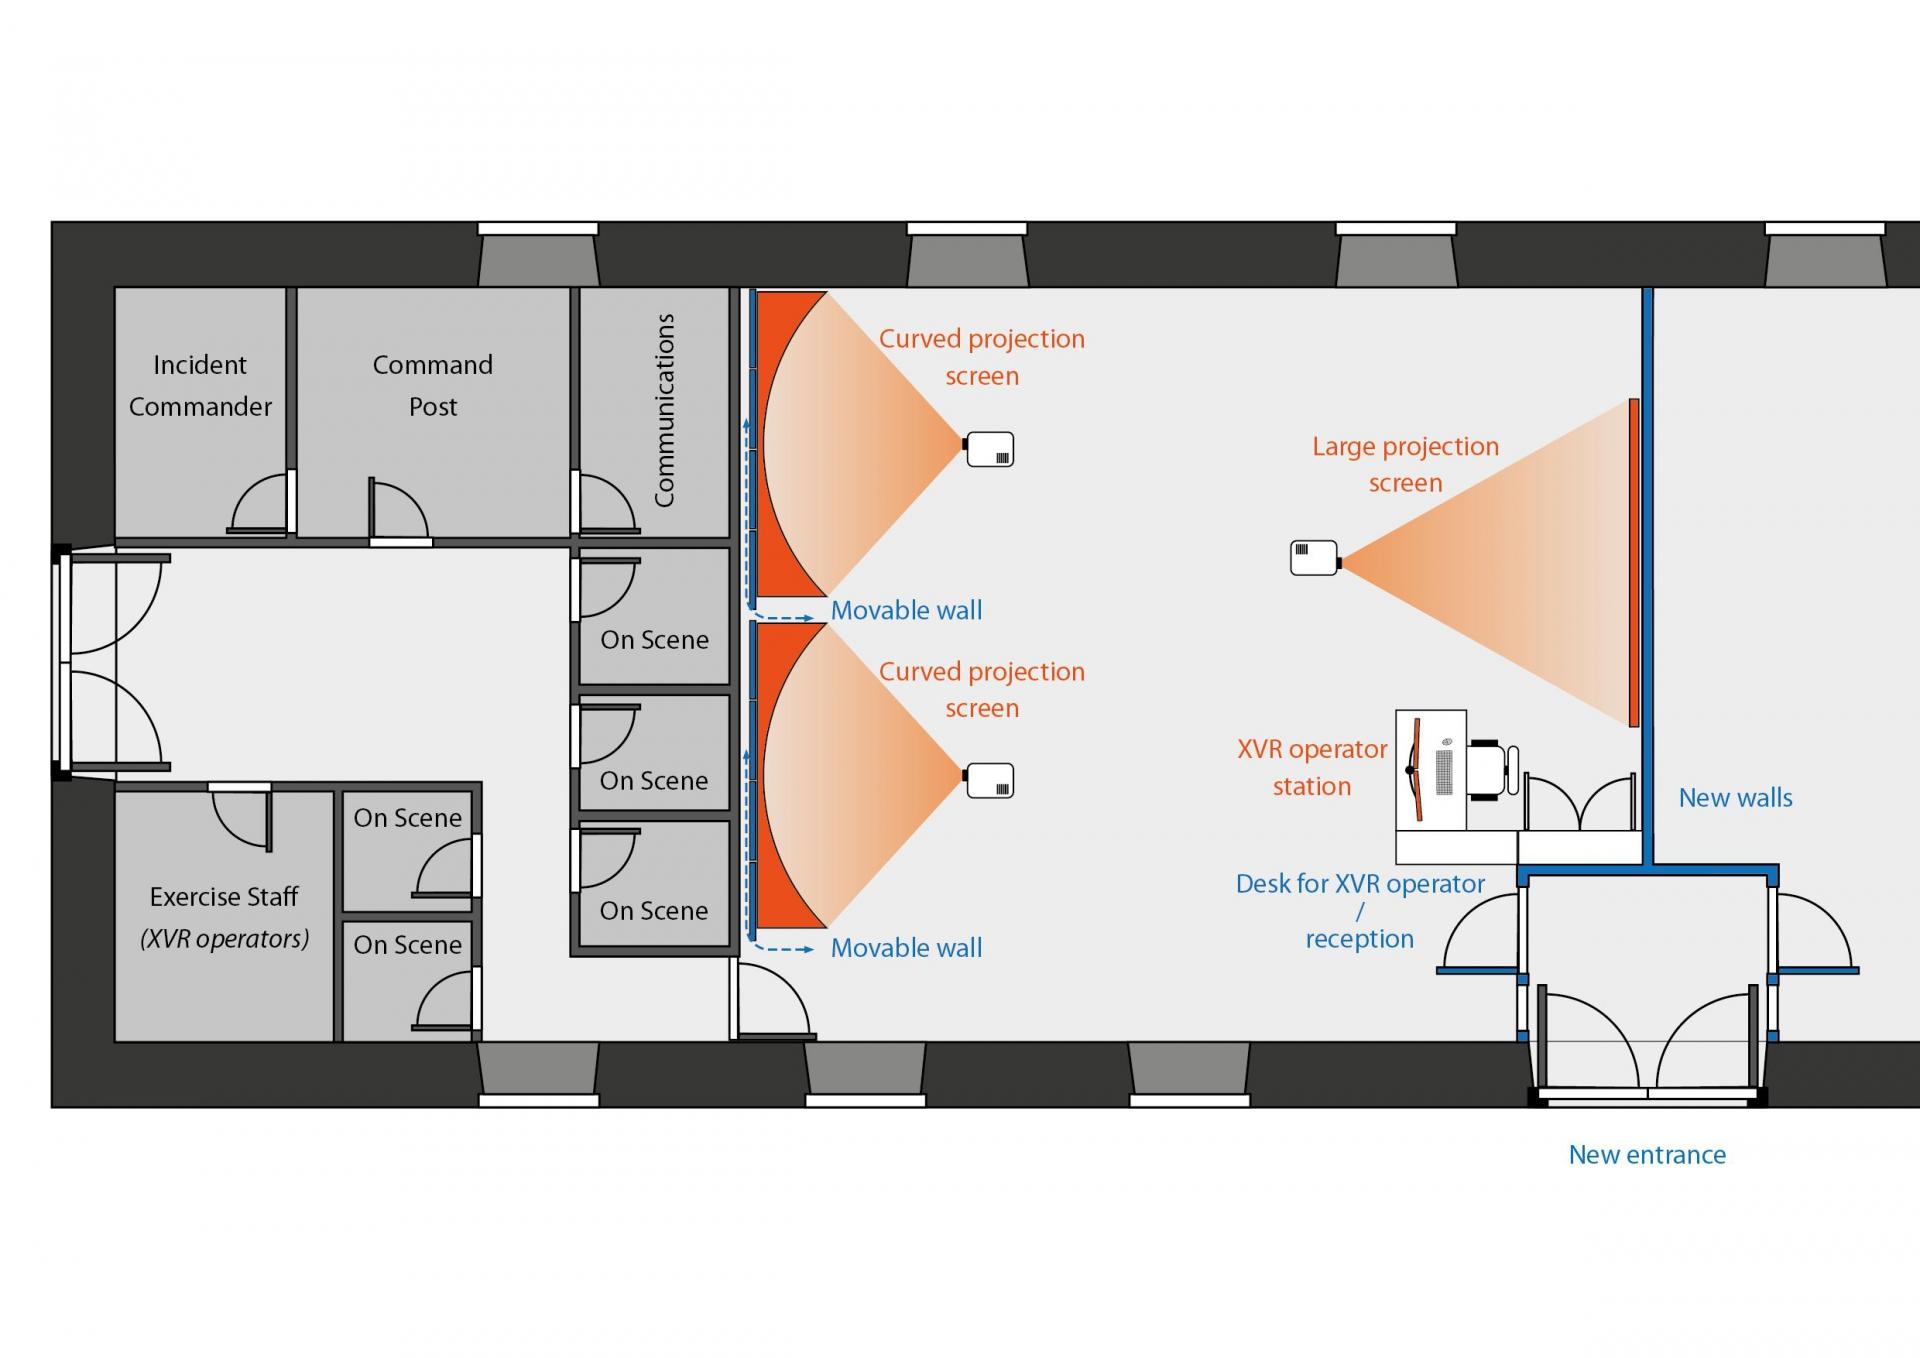
5. Lay-out
Based on the designated space and the proposed training methods, we draw a map that provides you with a visual impression of how the simulation centre will look. Naturally, you get the opportunity to give feedback, so we can adapt the design.
6. Refined lay-out
We use your feedback to make a more detailed design, featuring 3D-sketches and input from the facility management and/or an interior designer. We also compile a so-called part list – with all the required technical equipment – for the ICT-provider, and create a diagram of the cable network.
7. The proposal
Based on the design, the part list and the network diagram, we write a commercial proposal. This proposal contains four parts: hardware, software, services, and agreements with third parties.
8. Implementation
When you agree with the proposal, we proceed – together with any additional service providers – to order all the components, and subsequently build and install the simulation centre, and train your instructors.
Final thoughts: a fixed simulation centre is not necessarily more expensive
Even though many of our users start out with a basic flexible simulation set, a fixed simulation centre is not by definition more costly. Sometimes existing equipment can be re-used in the simulation centre. And the reduced wear and tear from moving equipment around not only limits the risk of malfunctions, in time it also saves repair and replacement costs. Moreover, Desktop PCs and related components are on balance cheaper than the laptops that are required for a flexible set-up.
Would you like to know which solution for a fixed simulation centre we can offer within your budget and possibilities? Feel free to contact me.Steven van Campen is Manager Innovation Projects for XVR Simulation and operates as a consultant for our clients worldwide during the design and implementation of simulation centres.

.jpg?resolution=20x19&quality=1&type=webp)
